The Spatial Blueprint: Real Lessons from Fitting Pool Tables into Aussie Sheds

To me, customer satisfaction is never just about shipping a product and walking away. It is about understanding exactly where that heavy slate table will sit so the customer enjoys a flawless playing experience for years to come. If you fail to plan your structural clearances and room dimensions properly before installation day, what should be a dream setup can quickly become frustrating. Nobody wants to line up a difficult shot only to smash the back of an expensive cue into a steel portal frame or wall girt.
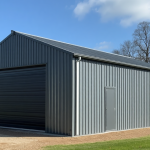
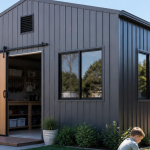
Most Australians building a proper backyard shed or garage conversion aim for a traditional 8ft pool table. It is the sweet spot for achieving that authentic pub-style playing experience. However, before locking in your order, it is essential to understand how the internal geometry of a steel building interacts with the physical space required to comfortably play the game.
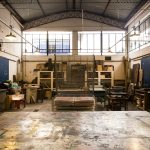
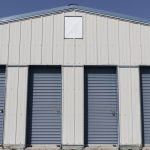
Unlike residential homes built with flat timber studs hidden behind plasterboard, modern steel garages and workshops are engineered very differently. Steel shed kits rely on rigid portal frames, structural knee braces, apex plates, and horizontal wall girts for strength and wind rating compliance. These components project inward from the walls and reduce your actual usable playing space. If you base your measurements purely on the slab dimensions shown on paper, you can easily discover too late that the real internal playing area is far smaller than expected.
Every week, we speak with customers who purchase standard 6×9-metre or 7×12-metre shed kits believing they have endless space, only to realise the structural steelwork significantly impacts cue clearance. Cold-rolled steel columns and portal frames create obstruction points throughout the shed. A standard 57-inch cue can easily strike one of these steel sections during a backswing if the room has not been planned correctly. Understanding how a billiard layout interacts with the actual structural skeleton of a steel building is one of the biggest factors in creating a premium recreation space.
The True Metric of Cue Clearance and Room Geometry
The most common mistake people make is measuring only the outer dimensions of the table itself and assuming that if the table physically fits inside the room, everything will work perfectly. What they often forget is that the player also needs enough surrounding space to comfortably use a full-length cue.
For unrestricted gameplay, you should allow approximately 1.5 metres of completely open space around all four sides of the table. This aligns closely with spacing recommendations recognised by organisations such as Cue Sports Australia for comfortable competitive play. For a standard 8ft table measuring roughly 2.44 metres by 1.32 metres, this means the ideal clear room size is approximately 5.4 metres by 4.3 metres. Any bar furniture, fridges, lounges, shelving, or dartboard cabinets should sit outside this primary playing zone.
If you are still in the planning stage of your shed build, reviewing practical shed planning resources such as the ShedBlog How to Buy a Shed guide can be extremely helpful. Properly planning internal clearances before manufacturing begins can save significant headaches later.
The Classic Tale of the Keen Tassie Customer
One customer from Tasmania comes to mind whenever this topic comes up. He was an absolute gentleman and incredibly excited about installing one of our premium pool tables into his newly completed steel garage. While speaking over the phone, he described the fresh Tasmanian air and beautiful surroundings so well it almost made me want to leave the warehouse and catch the next ferry down there myself.
He was completely confident he had more than enough room for a large traditional setup. After doing his own measurements, he believed he still had around twenty millimetres of clearance remaining between a full cue swing and the shed walls, even after adding a bar area and stools. I specifically asked whether he had measured from the internal steel portal columns or only from the wall sheeting itself, but he laughed and reassured me everything would fit perfectly.
We delivered the table, and a few days later my phone rang. He was laughing so hard he could barely speak, although there was definitely a bit of pain behind the humour. During the very first game, he stepped back to break, drew the cue backwards, and drove the butt of the cue straight into a large steel knee brace projecting from the wall. He said the crack echoed through the shed loudly enough to wake the neighbours.
In the end, he had to completely rearrange the layout of the shed, shift furniture around, and reposition the table off-centre just to regain comfortable cue clearance from one end of the room. Fortunately, he handled the situation with a good sense of humour, but it perfectly highlights a mistake many people make.
The lesson is simple: never measure wall-sheet to wall-sheet. Always measure from the innermost projecting point of the structural steel framework to ensure your cue paths remain completely unobstructed.
Slab Levelness and the Science of Levelling Compounds
A quality game of pool relies heavily on accurate ball roll and a perfectly level playing surface. Lightweight flat-pack tables may tolerate a small amount of floor variation, but professional-grade slate tables are a very different story. Depending on the model, a genuine slate table can weigh anywhere from 250kg to well over 400kg. That enormous weight transfers directly through concentrated point-loads onto the slab beneath each leg.
The reality is that many domestic concrete slabs are intentionally poured with a slight drainage fall to direct water away from garages and outdoor spaces. While excellent for drainage, this can create problems for billiard tables. Adjustable leg levellers are designed to fine-tune small variances, not compensate for major structural slopes across a room. If the slab falls too aggressively, you may run out of adjustment range entirely and notice balls consistently drifting toward one side of the table.
Before installation day, it is worth checking the slab properly. You do not need specialised trade equipment for this. A long straight-edge or straight piece of timber combined with a standard spirit level is usually enough. If you notice significant dips or uneven areas greater than a few millimetres, it is far better to correct them before the table arrives.
If levelling work is required, avoid temporary fixes such as packing scraps of timber or carpet beneath the legs. Over time, the concentrated weight of the table compresses these materials and the table falls back out of level again. The proper solution is to use a quality polymer-modified self-levelling compound. After cleaning and priming the slab, the compound is poured into the low areas where it naturally settles and cures into a strong, durable surface capable of handling the concentrated weight of a slate billiard table.
Taking the time to properly measure cue clearances, understand the internal steel framework of your shed, and ensure the slab is completely level makes the difference between a frustrating layout and a genuinely premium entertainment space. If you are considering a long-term recreation investment built for Australian conditions, exploring quality slate pool tables can help you create the perfect games room setup for years to come.


