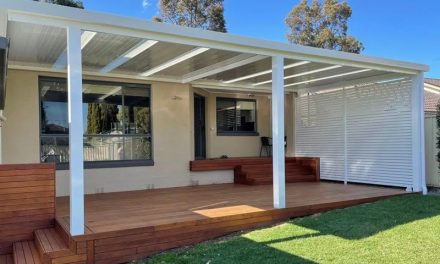
Lighting and Power Ideas for Backyard Workshop Sheds

A backyard workshop shed is only as useful as the lighting and power running through it. Without enough light, detailed cuts and fine work become guesswork. Without enough power, you’re constantly managing extension cords, blown fuses, and tools that can’t run at full capacity. It’s a frustrating way to work, and it’s more common than it should be.
Getting the electrical side right isn’t complicated, but it does take planning. The type of lighting, the circuit load, the wiring method, and the outlet placement all affect how well your shed actually functions day to day. A shed that’s wired and lit properly feels like a real workspace.
Read on to find practical lighting and power ideas that’ll help you get the most out of your backyard workshop shed.
Planning Your Electrical Supply and Power Capacity
Before running a single wire, figure out how much power your shed actually needs. Skipping this step leads to undersized circuits and costly fixes later.
The factors below are worth sorting out before any installation work begins:
Calculating your total load
Start by listing every tool and appliance you plan to use in the shed. Add up their wattage to get a working load estimate. This number tells you what circuit size you’ll need from the start.
Understanding permit and building codes requirements
Many jurisdictions require a permit before you run power to a detached shed. Building codes vary by location, so check with your local council or building authority first. Working without the right permits can create problems when it’s time to sell your property.
Choosing the right circuit for your setup
Most small sheds run fine on a 20-amp or 30-amp dedicated circuit from the main panel. A dedicated circuit keeps your shed from sharing load with other household appliances.
If you plan to run heavy-duty power tools (like welders or compressors) or install a subpanel in the shed to accommodate multiple circuits, check with a local electrician to determine whether you should upgrade your switchboard to help mitigate the risk of fire or electric shock hazards. Outdated electrical systems and switchboards may be unsuitable for safely handling the power demands of modern garden or handyman tools.
Choosing the Right Lighting Setup for Your Workshop Shed
Lighting affects how comfortable and accurate your work is over long periods. The wrong setup leads to eye strain, shadows in the wrong spots, and poor visibility on detailed tasks.
Here are some factors to consider when choosing lighting for your workshop shed:
Selecting the right fixture type
LED shop lights are the most practical choice for general shed lighting. They’re energy-efficient, long-lasting, and bright enough to cover a wide area. For a typical 10×12 shed, two to four 4-foot LED fixtures mounted to the ceiling handle most tasks well.
Matching color temperature to your work
Color temperature has a direct impact on how well you see what you’re doing. Lights in the 5000K to 6500K range produce a daylight-white tone that works best for detail work. It’s also the better range for color-accurate projects like painting or finishing, where tone and shade matter.
Planning fixture placement for full coverage
Ceiling placement alone won’t eliminate shadows across every work surface. Position fixtures to run lengthwise along the shed rather than across it. This spreads light more evenly and reduces the chances of working in your own shadow.

How to Use Task Lighting and Ambient Lighting in Your Shed
Overhead lighting covers the shed broadly, but it can’t do everything on its own. Shadows still form at workbenches, tool stations, and tight corners.
Here’s how to use both lighting types together for a setup that actually works:
Using ambient lighting as your base layer
Ambient lighting is your starting point. It handles general visibility across the whole shed. Without a solid ambient layer, task lighting has to work harder than it should, and the result is uneven light throughout the space.
Adding task lighting where it counts
Workbench areas benefit most from under-cabinet LED strips or adjustable arm lamps. These put light exactly where your hands are working without relying on overhead fixtures. A small clamp-on spotlight works well at drill press stations, scroll saws, and other stationary tools.
Avoiding shadows at critical work zones
Shadows at cutting or drilling zones are a safety issue, not just an inconvenience. Position task lights so they shine directly onto the work surface from an angle that your body won’t block. This keeps the cutting zone clearly visible regardless of where you’re standing.
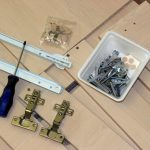
Safe Wiring Practices and Code Compliance for Shed Electrics
Shed wiring isn’t a task to rush or cut corners on. Poor wiring is one of the more common causes of outbuilding fires. Following code from the start protects both your shed and your home.
In most areas, shed wiring must meet local electrical codes and may require a permit. Underground cable running from the house to the shed needs to be buried at the correct depth. The specific depth depends on whether you use direct-burial cable or conduit.
GFCI-protected outlets are required in most outdoor and shed environments. Install them at every outlet location in the shed, not just near water sources. A GFCI breaker at the subpanel is another option that covers all outlets on that circuit.
Energy-efficient and Off-grid Power Options
Not every shed needs a direct connection to the home’s electrical panel. For light-use workshops or sheds in hard-to-wire locations, off-grid options are worth considering. Solar power has become a genuinely practical choice for many shed setups.
A basic solar kit for a shed typically includes one or two panels, a charge controller, and a battery bank. This setup handles LED lighting, phone charging, and small power tool use easily. It won’t run a table saw or dust collector, but it covers a lot of everyday needs.
Battery-powered tool systems have also improved dramatically in recent years. Many 18V and 20V platforms now cover drills, circular saws, jigsaws, and even sanders. For hobbyists who don’t need continuous high-draw tools, going cordless can eliminate the need for extensive wiring altogether.
Final Thoughts
A well-planned shed setup pays off every time you pick up a tool. The difference between a frustrating workspace and a functional one often comes down to decisions made before the first fixture goes up or the first wire gets run. Take the time to plan it properly, get the permits sorted, and don’t underestimate how much good lighting changes the experience of working in a shed.


