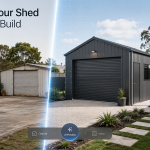
Safety Tips for Wiring Electricity in Your Shed

1. Know What You're Legally Allowed to Do
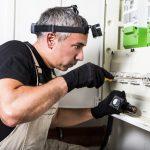
Rules are rules—and in the case of electricity, they exist for good reason. In Australia, only licensed electricians are allowed to carry out most electrical work. That includes:
- Running permanent wiring from the house to a shed
- Installing power points, switches, or lights
- Making connections at the switchboard
You might feel confident doing a bit of DIY, but when it comes to wiring, doing it yourself could break the law. You also risk serious injury or starting a fire. It’s just not worth it.
What can you do? You’re usually allowed to dig trenches for cables, mount fittings or switches (without wiring them), and decide where everything should go. Everything else? Call the pros.
2. Think Ahead About What You’ll Need
- How many power points do I need?
- What kind of lighting will work best?
- Will I run any heavy tools or appliances?
- Do I need internet or phone access?
3. Use the Right Type of Cable and Route
Most shed installations involve running a dedicated power line from your house. This needs to be done underground and protected in conduit to prevent damage from digging, pests, or water.
You’ll need to dig a trench—usually at least 600mm deep. Make sure it runs in a straight, clearly marked path. Don’t leave it open for too long, and make sure it’s safe to walk around while work is being done.
Important: Do not use an extension lead as a permanent solution. They’re only designed for short-term use and can become dangerous if left outside or overloaded.
4. Consider a Small Switchboard in the Shed
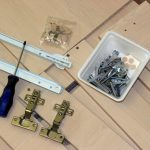
5. Pick Weatherproof and Rated Fittings
A shed isn’t as well sealed or insulated as your house. That means moisture, heat, and dust can all creep in and cause trouble if your fittings aren’t up to the task.
Use weatherproof light switches, sockets, and lights. Look for items with a proper IP rating:
- IP44 – Splash-resistant and fine for semi-exposed spots
- IP65 or above – Needed if items are directly exposed to the weather
And don’t forget UV-rated cables for any outdoor or exposed areas—they won’t degrade under the sun.
6. Think About Ventilation and Heat
7. Light It Right
A bright shed is a safe shed. Good lighting helps prevent accidents and makes the space easier to use year-round.
LED lighting is the go-to—it’s energy-efficient, cool to the touch, and lasts for years. You can also add:
- Task lighting over benches
- Motion-sensor lights near the entry
- Solar-powered exterior lights for extra visibility
8. Protect Your Gear from Power Surges
It’s not just your shed that needs protecting—think about what you’ll be plugging in. Sudden surges (especially during storms) can “damage or even destroy your electrical devices” says Mr Emergency Electrical.
Ask your electrician about surge protection during installation. It’s a smart extra that doesn’t cost much but can save a lot.
9. Don’t Skip the Paperwork
When your electrician finishes the job, they should give you a Certificate of Compliance. This is your proof that the work meets all safety standards and regulations.
Keep it somewhere safe—you may need it to:
- Make an insurance claim
- Sell your home in future
- Prove the work was done properly
If your electrician doesn’t offer one, ask. And if they still don’t—find a different one next time.
10. Inspect It Now and Then
Once your shed is powered and working, keep an eye on it. Every few months, take a quick look at:
- Power points and switches for signs of damage
- Lights flickering or tripping circuits
- Any strange smells or buzzing sounds
If anything feels off, switch off power to the shed and call your electrician. It’s better to be cautious than regretful.


