How to Rotate Your Tyres at Home – A Simple Aussie Guide

Mate, if you’re looking to squeeze every last kilometre out of your tyres and keep your ride handling sweet, tyre rotation is a must. It’s a simple job you can do in your backyard shed with a bit of know-how and some basic gear. Let’s crack into it!
Why Bother Rotating Your Tyres?
Your tyres don’t wear evenly. The front ones cop the brunt of the work, especially if you drive a front-wheel-drive car. They deal with steering, braking, and power delivery, so they wear out quicker than the rear ones. If you leave them in the same spot too long, you’ll be replacing them way sooner than you’d like.
Regular tyre rotations help:
- Extend tyre life – Even wear means you won’t need to shell out for new rubber as often.
- Improve handling and safety – Uneven tyres can mess with your grip, making cornering and braking a bit sketchy.
- Save money in the long run – Tyres are bloody expensive, so looking after them makes good financial sense.
Most manufacturers recommend rotating your tyres every 10,000 km or every six months, but check your owner’s manual to be sure.
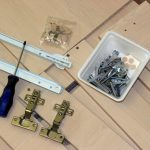
What You’ll Need
- Jack and jack stands – Don’t just rely on your car’s emergency jack; invest in a solid trolley jack and proper jack stands.
- Wheel brace or impact wrench – Makes life easier when loosening and tightening wheel nuts.
- Torque wrench – Ensures you tighten the nuts properly (no one wants a wheel flying off down the highway!).
- Tyre chalk or tape – Helps you mark where each tyre came from.
- Workshop gloves – Keeps your hands clean and safe.
Need quality gear? Grab your tyre tools & equipment here.

How to Rotate Your Tyres Like a Pro
- Park on a flat surface – Engage the handbrake and chuck some wheel chocks behind the rear tyres. Safety first, mate!
- Loosen the wheel nuts – Do this while the tyres are still on the ground. It’s easier and safer.
- Jack up the car – Lift one end of the car at a time and support it securely with jack stands. Never get under a car held up by a jack alone.
- Remove the wheels – Take off each wheel and use chalk or tape to mark where it came from.
- Follow the right rotation pattern:
- Front-wheel drive: Swap the front tyres straight to the back. Move the rear tyres to the front but switch sides (left rear goes to right front and vice versa).
- Rear-wheel drive: Swap the rear tyres straight to the front. Move the front tyres to the back but switch sides.
- All-wheel drive: Follow a criss-cross pattern (left front to right rear, right front to left rear, etc.).
- Check tyre pressure and condition – Since you’ve got the wheels off, now’s the perfect time to inspect for uneven wear, cracks, or low tread depth.
- Reinstall the wheels – Put them back on, hand-tightening the nuts.
- Lower the car and torque the nuts – Once the car’s back on the ground, tighten the wheel nuts to the recommended torque using a torque wrench. Check your manual for the right specs.
- Go for a test drive – Take a quick spin around the block to make sure everything feels right.
Bonus Backyard Shed Tips
- Rotate when changing oil – Kill two birds with one stone by rotating your tyres when you do an oil change. If you need oil filters, grab them here.
- Invest in a good floor jack – Makes life a lot easier than the factory scissor jack.
- Check alignment – If your tyres are wearing unevenly, it might be time for a wheel alignment. If you need steering components, find them here.
Tyre rotation is one of those little jobs that makes a big difference. It’s easy, saves you money, and keeps your car handling at its best. So next time you’re tinkering in the shed, don’t put it off—give your tyres a quick swap and keep that rubber rolling longer.
Need gear or car parts to get the job done? SuperSpares has you covered. Cheers and happy wrenching, mate!


