How to Convert a Shed into a Tiny Home: A Complete Beginner’s Guide

With housing affordability at an all-time low and a growing interest in minimalist lifestyles, more Australians are exploring creative ways to live smarter — and smaller. One increasingly popular solution? Converting a backyard shed into a fully functional tiny home.
But turning a basic storage shed into a liveable space isn’t as simple as adding a mattress and a coat of paint. A successful conversion demands planning and compliance with local building regulations. It also means considering insulation, waterproofing, ventilation, power, plumbing, and smart interior design.
This complete beginner’s guide walks you through the key steps involved in transforming a standard shed into a comfortable and compliant micro-home. Whether you’re building a guest retreat, a full-time residence, or a weekend escape, this guide will help you get started the right way — from council approvals to finishing touches.
Is It Legal to Live in a Shed in Australia?
Before planning your shed-to-home conversion, it’s crucial to understand the legal requirements, because no, you can’t simply move into a backyard shed and call it home.
Across Australia, sheds are classified as non-habitable structures under the National Construction Code (NCC). To live in one legally, you must convert it into a “Class 1a” dwelling, which meets residential building standards for insulation, weatherproofing, ventilation, sanitation, and safety.
What does that involve? You’ll need council approval, a building permit, and construction work that brings the structure up to code. This may include new framing, insulation, wall linings, waterproofing, and drainage. The process varies by state and local council. So, while living in a shed is possible, it’s never legal unless the structure has been formally approved and upgraded to meet residential standards. Always consult your local council before starting.
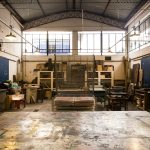
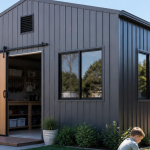
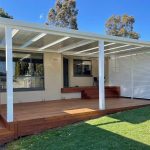
Shed Selection: Choosing the Right Structure
Choosing the right shed is one of the most important steps in a successful tiny home conversion. Whether you’re starting from scratch or working with an existing structure, several key considerations will impact liveability and compliance.
Size and Layout Considerations
Your shed needs to be big enough to comfortably fit essential zones, including a sleeping area, a kitchenette, a bathroom, and a small living space. For most conversions, a minimum floor area of 20–30m² is ideal. Ceiling height also matters. You’ll want internal walls at least 2.4 metres high to meet residential standards and avoid a cramped feel.
It’s also worth thinking about the internal layout early. Where will plumbing run? Can you fit a bathroom pod or shower cubicle? A well-planned layout now will save costly alterations later.
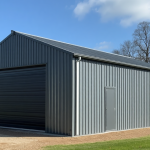
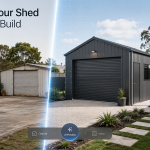
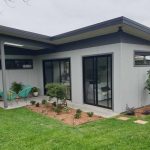
New Build vs. Converting an Existing Shed
If you’re starting fresh, designing a new shed gives you more control. You can choose the right size, frame type, and ensure it’s built to meet future Class 1a dwelling requirements from the outset. This is often the easier path for full-time living.
On the other hand, repurposing an existing shed can save money — but only if the structure is sound. You may need to strengthen framing, add subfloor insulation, upgrade cladding, or completely re-roof. Always assess structural integrity before committing to a conversion.
Timber vs. Steel Frame: Which Is Better?
Both timber and steel-framed sheds have their pros and cons for shed homes.
- Timber frames are easier to modify and insulate. They’re ideal for DIY builders and allow for easier internal fit-outs. But they require proper termite protection and can be vulnerable to moisture if not sealed correctly.
- Steel frames are strong, lightweight, and resistant to pests and rot. They’re great in harsher climates but may be harder to customise or cut into when running plumbing and electricals.
Tip: For DIY conversions, timber frames tend to offer more flexibility. For prefab solutions or extreme climates, steel can provide added peace of mind.
Planning the Layout: Making the Most of Small Spaces
Designing a tiny home inside a shed is all about smart use of space. With limited square metres, every layout decision makes a difference — not just for comfort, but for compliance and efficiency too.
Open Plan or Partitioned?
Most shed conversions lean towards open-plan layouts. Removing internal walls creates the illusion of more space and maintains flexibility. A studio-style setup, which combines living, sleeping, and cooking zones, is popular for its simplicity.
That said, you’ll likely want to enclose the bathroom for privacy and moisture control. A sliding door or compact cavity slider can save space compared to a traditional swinging door.
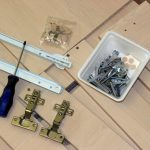
Smart Storage and Multi-Use Furniture
Clever space-saving solutions are what make tiny homes work:
- Loft beds free up floor space for living or working areas below.
- Fold-down tables and wall-mounted benches can be tucked away when not in use.
- Built-in storage seating adds comfort without wasting space.
Look for furniture that pulls double duty — storage ottomans, nesting tables, or modular shelves that act as room dividers.
Keep the Bugs Out
Sheds tend to be very popular with the insect and arachnid population, so you’re also going to want to think about how you can keep too many critters from moving in as well.
Make space to set up flyscreens over any entry ways, which will help to keep your shed a bit cooler with more air flow, but still prevent wasps, ants, and spiders from crawling or buzzing in with abandon.
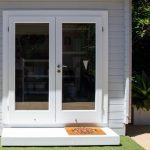
Let in the Light
Small spaces can feel even smaller if they’re dark or poorly ventilated. If you’re designing from scratch, position windows to allow natural light to enter throughout the day. Consider using clerestory windows for privacy and airflow, without sacrificing wall space.
Don’t forget ventilation — roof vents, louvre windows, or even a small skylight can help regulate moisture and reduce reliance on mechanical cooling.
Tip: Use light, reflective colours and large-format wall panels or tiles to expand the space visually.
Insulation & Weatherproofing Essentials
A shed might be built for storage, but turning it into a home means treating it like one — and that starts with proper insulation and weatherproofing. Without it, you’ll battle uncomfortable temperatures, moisture problems, and high energy bills.
Why Insulation Matters
Sheds heat up fast in summer and lose warmth quickly in winter. Good insulation keeps your tiny home liveable year-round and helps prevent condensation, a common issue in small spaces that can lead to mould and mildew. It also reduces noise, especially if you’re near a busy road or sharing a property.
Best Materials for Tiny Home Insulation
When retrofitting or building a shed for living, focus on all three surfaces — roof, walls, and floors:
- Walls and roof: R2.5–R3.0 bulk insulation batts (fibreglass or polyester) are affordable and effective. Rigid foam panels (such as PIR) offer higher insulation per millimetre and are suitable for tight spaces.
- Floor: Use rigid insulation boards under the subfloor or between joists to prevent cold from rising up from below.
Tip: Always check the insulation values (R-values) required in your region, especially if you’re converting to a Class 1a dwelling.
Don’t Forget to Seal It Up
Insulation is only half the battle. Tiny homes need to be airtight to stop draughts and moisture leaks:
- Seal gaps around windows, doors, and wall junctions using expanding foam or weatherproof sealant.
- Use vapour barriers in bathrooms and wet zones to prevent moisture from entering the wall cavity.
- Install flashing around roof penetrations and joinery to prevent water ingress.
Done properly, insulation and sealing make a big difference to comfort and long-term durability.
Utilities: Power, Water, and Waste Management
Whether you’re going fully off-grid or connecting to mains services, planning utilities is a crucial part of transforming your shed into a liveable shed home. It’s also where a lot of your budget and compliance requirements will come into play.
Power: Mains or Off-Grid?
If your shed is on a serviced property, connecting to the main power grid is the most straightforward option — though it will need to be done by a licensed electrician and approved by your local council.
For off-grid living, solar power systems are a popular choice. A basic setup includes:
- Solar panels mounted to the roof
- Battery storage to supply power overnight
- Inverter to run standard appliances
Tip: Opt for energy-efficient appliances and LED lighting to minimise power demand and keep battery sizes manageable.
Water Supply & Hot Water Options
If mains water isn’t available, install rainwater tanks and a pressure pump. A 5,000l tank is a good starting point for a single occupant, especially with water-saving fixtures.
Compact instantaneous gas or electric hot water systems are well-suited for tiny homes — they heat water on demand and eliminate the need for bulky storage tanks. Some systems can even run on LPG if you’re off-grid.
Waste Management: Sewage & Greywater
For toilets, you’ll need to decide between:
- Standard flush toilets (if connected to a septic or sewer)
- Composting toilets, which are odourless and great for off-grid setups
For greywater (from sinks and showers), you must either:
- Connect to a legal disposal system (like a greywater trench or reed bed)
- Collect it in a tank for treatment or disposal per your state regulations
Important: All plumbing must comply with the National Construction Code and be installed by a licensed plumber. Check with your local council for approvals related to your waste system.
Bathroom Fit-Out: Wet Area Tips for Tiny Sheds
Bathrooms in tiny shed homes must be functional, space-efficient, and moisture-resistant. With careful planning and the right materials, even the smallest shed can accommodate a fully functional wet area.
Small Space, Smart Layouts
When floor space is tight, consider:
- Shower and toilet combos using wet room-style floors
- Corner vanities to maximise usable space
- Wall-hung toilets or compact cisterns to free up floor area
Keeping the layout simple, with plumbing along one wall, also helps reduce installation costs.
Moisture Control Matters
Tiny bathrooms are particularly prone to condensation, making ventilation a critical necessity. Use an exhaust fan equipped with an automatic humidity sensor and select materials that won’t trap moisture.
Swap Tiles for Wet Wall Panels
Traditional tiles require waterproof membranes, grout, and extensive labour. A faster, cheaper, and easier solution? Wet wall panels — they’re:
? 100% waterproof
? Grout-free and mould-resistant
? Lightweight and DIY-friendly
? Available in stone, marble, concrete, and tile-look finishes
Perfect for tiny bathrooms, these panels install directly over existing surfaces — saving time and reducing the need for specialist trades. Wet Wall Works’ wet wall panels are one of the most practical options for tiny bathroom walls and shower surrounds. They combine modern design with all the performance benefits of traditional tiling, without the mess or maintenance.
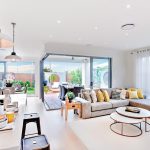
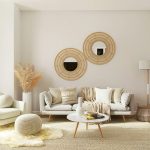
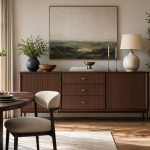
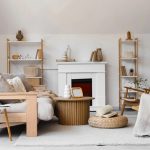
Interior Finishing Touches
Once your shed is structurally sound and weatherproof, it’s time to make the inside feel like home. Smart material choices and clever design details can make a compact space feel surprisingly spacious and comfortable.
Flooring Options
Tiny homes demand flooring that’s durable, lightweight, and easy to install:
- Vinyl planks are affordable, waterproof, and available in timber-look finishes.
- Hybrid flooring offers a sturdy, low-maintenance option with a more premium feel.
- Polished plywood is a budget-friendly and minimalist choice — just seal it properly for use in wet areas.
Tip: Use the same flooring throughout the space to create flow and make the area feel larger.
Wall Finishes
Lightweight materials are ideal for lining interior walls. Popular options include:
- Painted plywood – gives a warm, modern feel and is easy to update.
- VJ or lining boards – add character and suit coastal or rustic styles.
- Wet area panels – perfect for bathrooms. Waterproof panels are stylish, grout-free, and quick to install. They’re a practical alternative to tiles in small spaces.
Built-In Storage Ideas
Maximise every square metre with clever built-ins:
- Use loft beds with under-storage or built-in drawers.
- Install wall-mounted shelving to free up floor space.
- Choose multi-purpose furniture like ottomans or benches with hidden storage.
With smart finishes and functional design, even the smallest shed can be transformed into a liveable and attractive home.
Conclusion
Converting a shed into a tiny home is more than a trend—it’s a smart solution for affordable, efficient living in Australia. From securing council approvals to insulating, planning your layout, and choosing finishes that suit compact living, each step plays a role in creating a comfortable, long-lasting space.
With good planning and practical choices, even a small shed can be transformed into a warm, functional home that meets your needs and style. For bathrooms and other wet areas, opting for waterproof wall panels, such as those offered by Wet Wall Works, ensures a low-maintenance, durable finish ideal for tiny homes.
By making smart, space-conscious decisions throughout your build, you’ll create a home that’s not just small—but perfectly formed.


