DIY Home Energy Audit: Spotting Hidden Leaks

That feeling of opening an energy bill and getting a nasty shock is all too familiar for many Aussie homeowners. As the seasons change, we crank up the heating or the air con, often without realising just how much expensive conditioned air is escaping our homes. The good news is you don’t need to be an expert or hire a pricey consultant to find the culprits. A simple DIY home energy audit can uncover the hidden leaks and inefficiencies that are costing you money and comfort. With a bit of time on a weekend, you can walk through your home, identify problem spots, and create a plan to make your space more comfortable and energy-efficient.
Check for Air Leaks
Uncontrolled air leaks, or draughts, are one of the biggest ways energy slips out of your home. These are the sneaky gaps and cracks that let cold air in during winter and hot air in during summer, forcing your heating and cooling systems to work overtime. Finding them is the first step to plugging them up.
A great way to start is by simply using your senses. On a windy day, walk around your home and feel for cool air coming in around window frames, door jambs, skirting boards, and even power points and light switches. For a more scientific approach, you can try the incense stick test. Light a stick of incense and carefully hold it near areas where you suspect a leak. If the smoke wavers or is blown horizontally, you’ve found a draught. You can learn more about how to find air leaks with simple methods like this.
Pay close attention to these common problem areas:
- Where plumbing or wiring enters the house through walls or floors.
- Around exhaust fans and ceiling vents.
- Junctions where different building materials meet, like where brick meets weatherboard.
- Fireplace dampers that don’t seal properly.
Make a list of every leak you find. You’ll be surprised how many little gaps can add up to a significant amount of energy loss.
Evaluate Your Insulation
Think of insulation as the beanie and scarf for your house. It’s the primary barrier that keeps warmth inside during winter and outside during summer. If your insulation is old, compressed, or has gaps, it’s not doing its job effectively. A quick inspection can tell you a lot about its condition.
For most homes, the easiest place to check is the ceiling cavity. Before you go up, make sure to turn off the power at the main switch for safety. Using a torch, have a look at the state of the insulation batts or loose-fill material. You’re looking for consistent coverage with no gaps or empty spots. The insulation should be fluffy and fill the entire cavity between the joists. If you see areas where it’s been compressed, is damp, or has been moved by pests, these are red flags. Water stains on the ceiling are also a clear sign that moisture has compromised the insulation’s effectiveness.
You should also check that the insulation hasn’t been installed over downlights unless they are specifically rated for it, as this can be a fire hazard. The Australian government provides guidelines on insulation standards and R-values, which measure thermal resistance. The higher the R-value, the better the insulation performs. Performing these DIY checks and inspections will give you a clear picture of whether your home’s “beanie” needs an upgrade.
Windows and Doors Efficiency
Your windows and doors are essentially big holes in your insulated walls, and they can be a massive source of energy transfer. Older, single-pane windows in particular offer very little resistance to heat flow. You can literally feel the heat radiating through them in summer and the cold seeping in during winter.
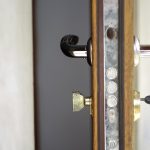
Start by checking the seals around your windows and doors. Look for cracked or peeling sealant on the exterior and worn-out weather stripping around the frames. If you can see daylight around a closed door, you’re losing a significant amount of energy. Rattling windows are another sure sign that the seals are no longer airtight.
While sealing gaps is a good first step, the glass itself is often the weakest link. If you have single-glazed windows and are serious about improving your home’s energy performance, upgrading them is one of the most effective changes you can make. A full window replacement can be costly and disruptive, but there are other excellent solutions. For many homeowners, retrofit double glazing is a smart and effective option. This process involves installing a second pane of glass into your existing window frames, creating an insulating air gap that dramatically reduces heat transfer and can also help with noise reduction. It provides the benefits of double glazing without the cost and hassle of a complete replacement.
Optimise Heating and Cooling
Even the most well-sealed and insulated home will waste energy if its heating and cooling systems aren’t running efficiently. Your air conditioner and heater are the biggest energy consumers in your house, so a little maintenance can go a long way in reducing your bills.
The single most important DIY task is to regularly clean or replace the filters in your heating and cooling units. Clogged filters restrict airflow, forcing the system to work harder and use more energy to circulate air. This should be done every one to three months, depending on how much you use the system.
If you have a ducted system, it’s also worth checking the ductwork in your ceiling cavity or under the floor if it’s accessible. Look for any disconnected joints, tears, or holes where air might be escaping. Sealing these leaks with mastic sealant or specialised metal tape ensures that the conditioned air actually makes it to the rooms you want to cool or heat. Also, consider your habits. Closing doors to rooms you aren’t using helps to concentrate heating or cooling where it’s needed most, reducing the load on your system. Upgrading to a programmable or smart thermostat can also automate this process, adjusting the temperature when you’re away or asleep to save energy without sacrificing comfort.
Simple DIY Improvement Tips
Once you’ve completed your audit and identified the problem areas, it’s time for the fun part: fixing them. Many of the most effective solutions are simple, low-cost DIY projects that you can tackle over a weekend. These small changes can add up to big savings on your energy bills.
Here are some straightforward improvements you can make:
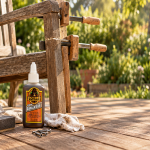
- Seal the gaps: Use caulk for small cracks and gaps around stationary window frames, skirting boards and cornices. For larger gaps, expanding foam can be a good option.
- Add weather stripping: Apply self-adhesive foam or rubber weather stripping to the inside of door and window frames to create an airtight seal when they are closed.
- Use door snakes: A simple fabric “snake” placed at the bottom of an external door is a classic for a reason; it effectively blocks under-door draughts.
- Install heavy curtains: Thermal-backed curtains or heavy drapes act as an extra layer of insulation for your windows, trapping a layer of air and reducing heat transfer. Make sure they have a pelmet or a tight fit at the top to prevent air from circulating behind them.
- Seal your chimney: If you have an unused fireplace, an inflatable chimney balloon or a custom-fit flue blocker can prevent huge amounts of air from escaping.
Putting together a plan based on your findings from a DIY home energy audit will empower you to make targeted improvements that have a real impact on your home’s comfort and your wallet.
Taking the time to understand where your home is losing energy is the first step toward a more comfortable and affordable living space. You don’t need to do everything at once. Start with the simplest fixes, like sealing draughts, and you’ll already be on your way to a more efficient home.