
Among the best methods to update and revitalise houses in Watson, ACT, is painting. Many homeowners, however, make basic errors that might produce unsatisfactory results and expensive rework.
Watson’s climate—which has frigid winters, scorching summers, and sporadic high humidity—also influences paint’s performance over time. To guarantee a long-lasting and attractive finish, avoid the eight typical painting blunders listed below.
- Not Purchasing sufficient paint
Undervaluing the amount of paint to buy is one of the most often occurring errors DIYers make when starting a painting project. Simply “guesstimating” or sloppy measurements could lead to miscalculating of the paint required to completely cover the surface area.
Apart from the trouble of an emergency paint run halfway through your job, buying paint in two batches might cause mismatched hues. Measure the area you are painting carefully, then double-check your estimates with the paint or hardware shop specialists. Always get a little extra paint for touch-ups.
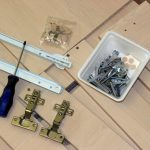
- Cutting Back on Tools
While using cheap brushes and rollers can help you save money, the quality of your paintwork mostly depends on the quality of your instruments. Affordable roller coverings or brushes will display tracking, fuzz, streaks and brush marks instead of hiding as effectively as top-quality finishes.
To prevent bubbling or blistering paint, you also must match the roller cover with the surface you are painting. For smooth surfaces, foam or short-nap roller covers are appropriate; for rough surfaces, long-nap roller covers are appropriate; for medium-nap roller covers, are appropriate.
- Ignoring the Prepare
Many do-it-yourself painters start painting without first allowing time to prepare the underlying surface. The drying paint might start to separate and create ugly bubbles or blisters when that surface is filthy, moist, not well prepared. The state of the surface you are painting determines much of a great paint job.
Use soapy water to wash the surface; rinse and dry. Patch and sand any holes or indentations; then, use a clean, moist towel to gather the resultant dust. Where necessary to hide stains or boost adhesion on bare drywall or plaster, use a primer. The surface is suitable for painting only after this pre-work is finished.
- Painting Rainy Day Inside Views
For interior paint projects, weather is a very significant consideration. Although interior painting might seem like a great activity for a wet day, you need to take ventilation and possible humidity into account should windows be open. Excess moisture might cause paint to dry slowly and cause blisters or bubbles that would compromise the new paint’s appearance.
Even painting inside, select a day with a bright sky and low breeze. Use fans or a dehumidifier to help control humidity while the paint dries by moving the air.
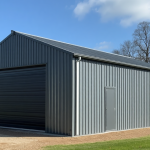
- Hot Day Painting Exteriors
Choosing the ideal weather for outdoor painting work is much more important. Recall that, while painting outdoors, extremes are our adversary.
Paint occasionally rises away from its underlying surface in extreme heat or bright sunshine, producing blisters or bubbles. Select a day with below 85 degrees F temperatures. Paint outside in the shade; surface temperatures in direct sunlight may be much greater than air temperature.
Dark hues absorb heat instead of reflecting it, which might aggravate this disease. Pay attention to the LRV, or light reflecting value, on the rear of the paint chip; this will help you to be aware of the requirement of properly painting certain colours.
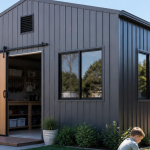
- Selecting an inferior exterior paint
Exterior paint must resist anything that Mother Nature tosses at it. Often fading, low-cost paints often acquire mildew or other defects.
With exterior paints, longevity mostly depends on excellent exterior paints resist scorching and maintain colour longer. To save time and money on upkeep, look for paints designed to withstand chalking, mildew and grime.
If you have exteriors that call for very good paint performance. Ask several inquiries about your outside painting tasks and know what you are getting.
- Ignoring the Primer
Using a proper primer is especially crucial as outdoor paint projects require more long-lasting strength to resist the environment. Many do-it-yourselfers cut this basic step to save time. Painting straight onto certain materials, such as wood, might cause peeling and cracking, however. Others, such as stucco, often show blisters and bubbles.
Covering stains or changing from a dark to a light colour also need a primer to ensure the darker foundation doesn’t influence the final tint. Like with exterior paint, selecting the appropriate primer requires consideration of many criteria. Research it and get advice from the professionals at your hardware or paint shop.
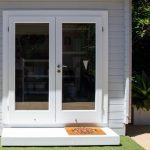
- Not Providing Protection Against Moisture
Often eager to begin painting directly to painting, homeowners neglect enough preventative measures against future moisture seepage. Water intrusion from behind over time may cause exterior paint to blister or peel and greatly limit the lifetime of the paint job.
Apply a high-grade acrylic latex caulk around doors and windows or other surface flaws like holes and cracks as part of surface prep. Although it adds an additional step, careful caulking prevents water from degrading the final result.
In conclusion
Whether you are repainting the outside of your house or updating an interior wall, avoiding these frequent errors guarantees a professional-looking, long-lasting outcome.
Watson’s environment calls for particular attention to paint choice, moisture management, and surface preparation. Using premium products and correct processes can help you to get a beautiful and long-lasting finish. For more tips on painting houses in Watson, visit the CHL painting website in Canberra, ACT.


