*** IT IS IMPORTANT TO READ AND UNDERSTAND THIS DOCUMENT BEFORE PURCHASING PROFILE shape VERMIN AND EMBER SEALS ***

Typical High Profile cladding


PLEASE READ…
Our fixed profile Vermin & Emberseals are designed to match closely with the major brands of Australian Steel cladding manufactured from Bluescope Steel coil. If you are considering Superseal, look here instead.
The nature of steel cladding and the fact that it is rolled in various locations around Australia using differing machinery results in variations. The roll formers acknowledge this in their product specifications. Typically 2-4mm is the quoted variance.
The vermin seals will work with these variations if you are prepared to work with them.
The installation process of steel cladding affects its shape when it’s applied to a building’s wall. The cladding is often shrunk or stretched during the installation to align with openings and corners. It is also manipulated at overlaps to stay vertical on walls and aligned on roofs to the gables and end walls. These manipulations mean you may need to manipulate the vermin seals by cutting, moving, restarting with a new piece or an offcut and working along the wall to gain the optimal seal. Even the temperature can affect the steel in your building, which expands when hot and contracts when cold.
While we would like to see the seals we sell fit perfectly at all times, this is not what happens in the real world. You will likely need to make some adjustments during your installation to achieve the best result.
Any Questions? Please contact us by Chat, Email or Phone.
NOTE: Some shed manufacturers in Australia use wall and roof sheeting not manufactured from Bluescope Steel coil. These may have lower tensile and less stringent tolerances in their manufacture. As such, the wall cladding or roofing is more prone to not aligning with the vermin and emberseal profiles as readily as the varieties we have manufactured for. Will the vermin and ember seals still work? Yes, however, more cutting and adjusting will be required.
Profiled Seals these notices apply to.
This notice pertains largely to the following profiled seals.
Retroseal Domestic, Rural, Ridgeseal, Shadowline,
Skillion seal, Houseseal, Roofseal, Corro Corners,
Handyseal, Eaveseal, Hip & Valley Seals.
Mount Plates and Vents.
In both high profile and corrugated shapes.
Does not apply to Vermaseals or Superseal


keep reading please... more valuable information below to help your installation be successful.


A mismatch in the profile was caused by a poorly aligned wall sheeting overlap. The customer solved this by sealing a larger-than-normal gap with silicon. You could also fix it by cutting a slice or two out of the vermin seal at an appropriate location with a grinder, drop-saw or hand-saw. The wall sheet was also creeping already, so the addition of a cut and restart to the right would have helped align things further. The process of screwing seals to the wall sheet will also pull profiles in tighter to the wall sheet. The profiles on our vermin seals are able to be tightened into the wall sheets by the optional fastener pack screws.

This example shows a few mm gap that can sometimes appear between strips at a sheet overlap. This is easily solved with silicon.
Most small gaps can be sealed with a smear or dob of silicon. This is common practice. For an ultimate seal, a bead of silicon can be run along the sheeting at the top edge of the vermin and ember seals. Vermin will not be able to enter via small gaps of a few millimetres.

Handy seal (PVC) screwed under an eave. A small section was cut to infill the last part. The seal could be improved with some silicon if desired. Vermin, like mice, birds, and bats, will be excluded. Metal profiles like Houseseal or Eave seals used in this situation could be lightly hit with a hammer to push them closer to the cladding, closing the seal further.

In this image you can see during the installation that the customer has been fixing the retroseal to the concrete with silicon or a builders glue. The profiled vermin seal has also been screwed into place. A good result is being achieved. If the profile starts to mismatch the wall sheeting he could trim a piece to bring it back into alignment.

This customer is achieving a consistent finish, with most of the profiles nesting well into the corrugations. Small gaps are evident, but it is obvious that no vermin like mice, snakes, rats, lizards or frogs will enter via these wall profiles. If desired, they could seal further with some silicon. It also appears there are small nylon knock-ins pinning the retroseal to the concrete.
Enjoy the process!
Our Campbell Shed Products Vermin and Ember seals are 100% the best solution for excluding unwanted vermin from entering your shed through the wall and roof profiles. Take a few moments to read our guides and the reviews, knowing that if you take a few moments during the installation to cut and adjust, you will get a great result and, most importantly. Exclude vermin and embers from your shed.
If you have not built your shed yet, we highly recommend Vermaseal PVC or Steel Vermaseal or Z Vermaseal.
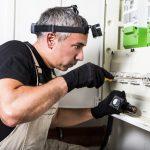
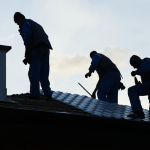
INSTALLERS PLEASE READ THIS
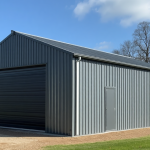
RETROSEAL SUPERSEAL
To be installed on the inside of existing buildings
Fitting the Backbone
Squash the lower fin of the flashing between the overhanging wall sheet and the edge of the concrete slab, with the fingerlip touching the floor, and the serrated rail to the top.
If the wall sheet is hard against the concrete, it may be necessary to loosen screws on the bottom girt. However, the flashing can usually be forced in. In this situation, it can be held in position with a few dobs of silicon under the fingerlip as an extra securement.
If a gap exists between the wall sheet and the concrete slab, the flashing should be fixed at its vertical face to the sheet pan area by a 10/16 tek screw or equivalent. The fingerlip can cover up to 27mm of gap.
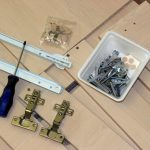
One of the best ways to do this is to drill a hole from the inside out with a smaller bit than the screw being used (while maintaining a position to effect the neatest finish), with a second person screwing a tek back from the outside, using the hole as a pilot (careful not to overscrew). The ideal screw position is beside the sheet profiles. Use enough screws to achieve the desired finish. Pop rivets can also been used successfully. If the optional fastener kit is chosen, As well as the Tek screws, you will be supplied with nylon pin anchors to secure the finger-lip to the slab for a fuller seal. Optional – a bead of silicon can be run along the products top edge to obtain an even greater seal.
Fitting the Tabs
Position a tab on the serrated rail. Apply pressure with the thumb on the tab curve and the extraction fin, and snap it in to the first groove. If a gap still exists between the tab and the wall profile, apply more pressure to snap it into the second groove and so on.
If it goes too far, use a screwdriver under the extraction fin to recover it and start again. On bigger tabs, it may be necessary to use a blunt screwdriver under the extraction fin, resting lightly on the tab curve, and tap with a hammer.
NOTE: Superseal should be stored in a cool place and out of direct sunlight prior to installation.


ANY QUESTIONS?
CHECK OUT THE COMPREHENSIVE FAQ PAGE OR
CONTACT OUR CUSTOMER SERVICE TEAM NOW help@shedblog.com.au
We have a range of products that suit vermin proofing, ember seals, bushfire protection, bushfire seals, and for repairing your shed, renovating your shed, building a shed and buying a shed, shed parts, shed windows, shed doors and shed brackets.