
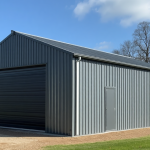
Are you sick of standing in the rain fumbling with keys? Had a gut full of that sticky lock keeping you from entering your shed quickly? I bet you’ve considered motorising your shed roller door! You wouldn’t be the first and you definitely won’t be the last!
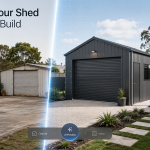
Here are 4 key things to think about when DIY’ing a roller door motor install:
1. Always choose a motor that suits the size of your door
There are a plethora of roller door motor manufacturers with multiple models available for residential and commercial use. While purchasing the cheapest motor in the model line up might sound like an easy choice, it’s not always the best choice. Always double-check the manufacturer’s recommendations and specifications regarding maximum curtain sizes and weights. Having an inadequate motor can cause many headaches such as Motor fatigue and burnout, Door curtains dropping causing damage to the door and possibly harm to nearby people and objects (Monaro, I’m looking at you) and valuable time lost repairing or waiting for replacement parts.
2. Do I need a battery backup?
While having a battery backup might sound like a bit of an extravagance, I guarantee you won’t mind having it the next time the power is out and you need to get into your shed. Battery Backup powers the garage door opener (and safety features) as if the power was still on.
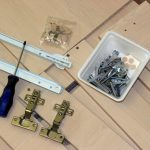
3. Always check your side room and fixings
Making sure you have enough room to fit a roller door motor is crucial to safe operation and easy installation. While specifications vary from manufacturer to manufacturer, allowing approximately 50mm – 70mm between the door curtain (in the open position) and the inside edge of the hanger bracket
will allow you ample room to install the majority of roller door operators without having to move your hangar brackets. Also check that you don’t have a recessed drum or you may need some steel tyne extensions for your motor. If you need to move your hangar brackets, always ensure there is ample steel or solid timber to fix your bracket in the new position. If in doubt, always call a professional.

4. Pinning your roller door

One of the benefits of motorising your shed roller door is that you no longer need to use the locking mechanism on the door curtain. Unfortunately, this does leave your door susceptible to a break-in, as there is no longer a locking bar holding the curtain down, it could effectively be lifted up high enough to allow a person underneath and into your shed. The best and little known way to combat this is called “Pinning”. The steps to achieve this are;
– Lower the door into the fully closed position
– Inspect the top of the door roll and mark the last rib of the curtain that touches the drum
– Follow that rib along the door curtain and mark the same spot on the other end of the curtain
– Insert a small Tek Screw or Waffle head screw through the door curtain and into the drum
– Do this on both ends of the curtain.
– Your door will now no longer be able to be lifted up while the motor is engaged, securing your shed and valuable property.
If you keep these 4 things in mind while pondering your motorisation options you’ll be in a far better position to ensure the longevity of your door, your motor and most importantly the safety and protection of your valuable assets locked inside.


